Note: Please note that not all checkout steps described below may apply, as these sections are determined by your organisation's preferences for when customers register and pay for their products and services.
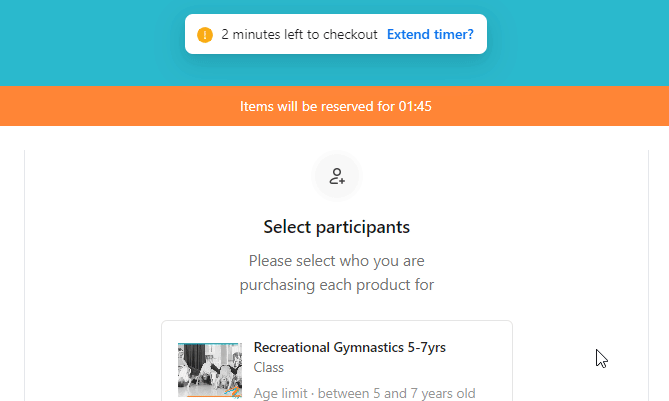
Checkout Timer
When you're ready to check out your items in the shop, you'll have a limited timeframe to complete your registration and payment. To help you stay on track, a countdown timer will be visible at the top of the checkout.
The time to complete checkout is determined by the organisation, with the default setting being 5 minutes.
A person will reserve a space in a class or an event for the duration of the checkout, until the checkout is completed, or the timer has expired.
Who are you buying for?
This step requires you to confirm the person you are adding the product to your basket for.
Select who you are buying for from the list of your existing friends and family. If you have not yet created a profile for the person you are buying for, you can select the 'Add new person' option.
Note: that when you add a new contact, you will be given the choice to use the address you provided when creating your JoinIn user account or to add a new address for the contact.

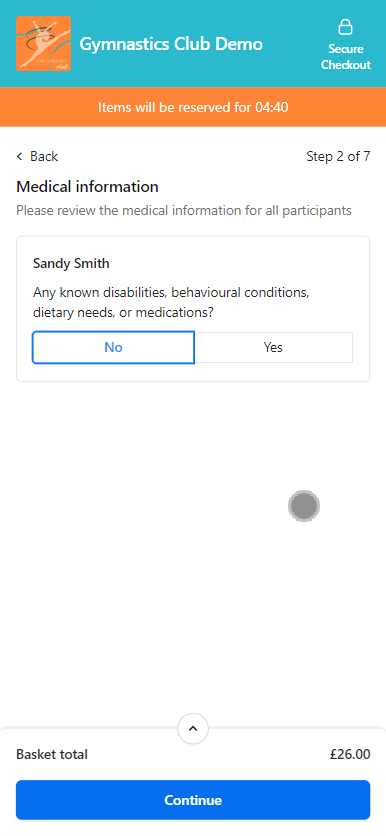
Medical Information
At this stage, may be prompted to provide medical information. Simply select either 'Yes' (and provide details) or 'No' to continue.
The medical information is collected in a standardised form that is divided into three sections. It is important to note that none of the sections in the medical form are mandatory.
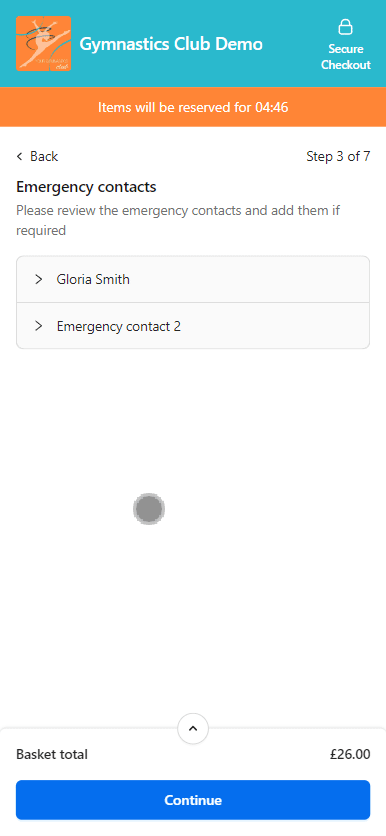
Emergency Contacts
Important: When adding a phone number or email, these must be unique for each person.
Organisations may request that you provide information for emergency contacts, usually one or two individuals. To add the necessary details for an emergency contact, simply navigate to the Emergency contact section and fill in the required fields, including the person's first name, last name, and phone number. Once you have entered the minimum number of emergency contacts, you can proceed by clicking the Continue button.
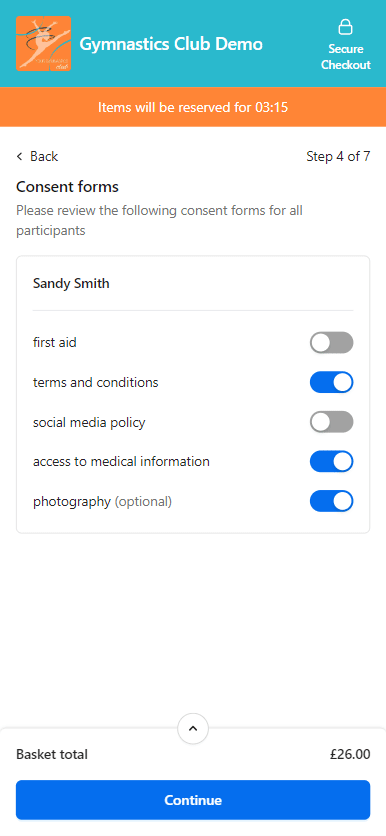
Consents
When making a purchase or registering for a service, the organisation may request your consent for various aspects of their service, such as accepting their terms and conditions or authorising first aid administration. To update your consent status, you can easily click on the consent switch between the options:
Grey = I do not consent
Blue = I do consent
Note: You cannot continue to the next steps of the checkout unless all required consents have been switched to blue.
Consents may be Required or Optional.
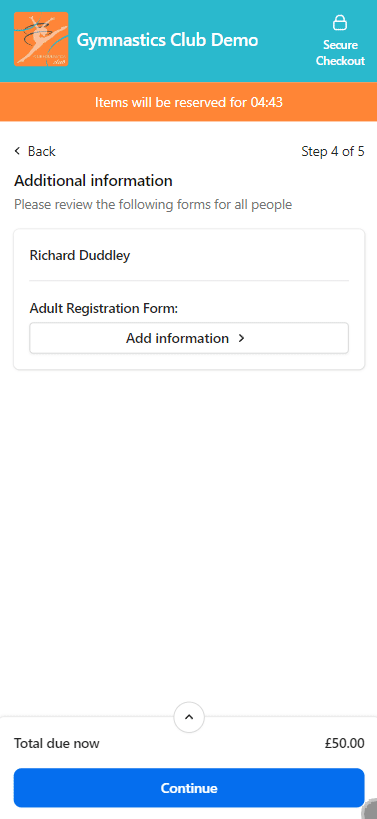
Additional Information
An organisation may want to gather more information from you that goes beyond the standard personal details. For example, they may be interested in knowing about your interest in volunteering or how you came to hear about their organisation.
To provide answers to these additional information questions, simply click on the "Add information" button. Required questions will be highlighted in red, and it is necessary to complete them before you can continue further.
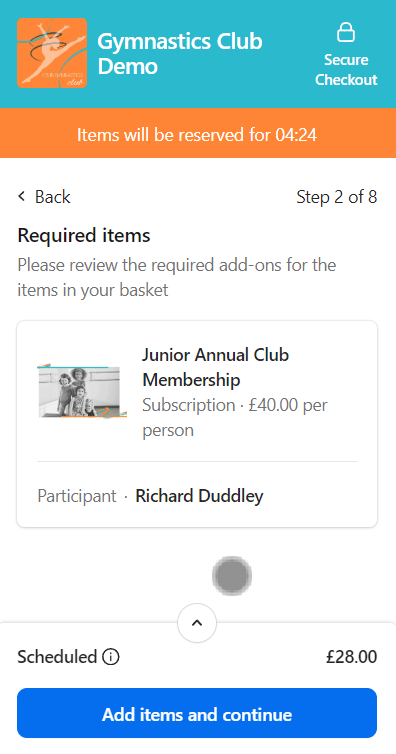
Additional Products
You may be required to add additional products to your basket as part of the checkout process. This will be determined by the organisation and the type of product or service you are checking out with. For example, you may be required to purchase insurance cover if you are purchasing a club membership.
To add the additional products, simply add the product on the screen to the basket.
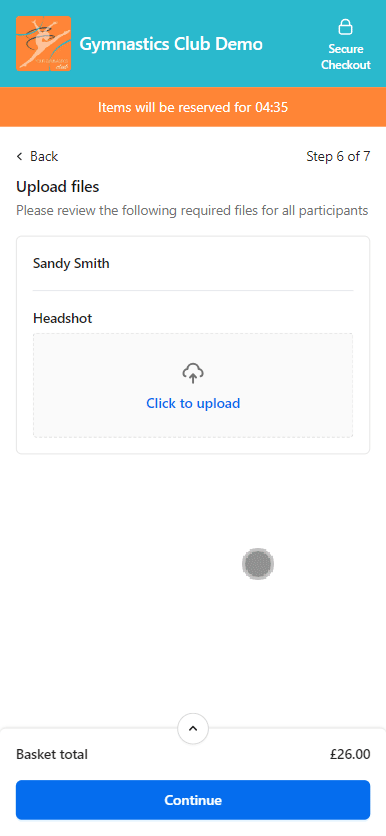
Required Files
You be may asked to provide additional documents or files, such as a student photo ID or other proof of age, during the checkout process by the organisation.
To upload the required document, simply click on the blue "Click to upload" button and select the correct file.
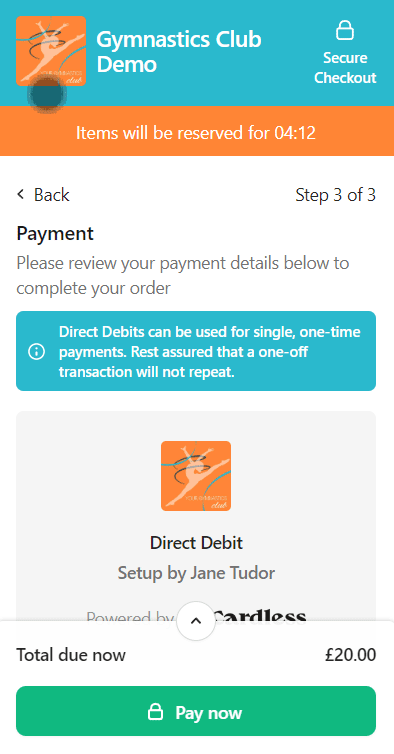
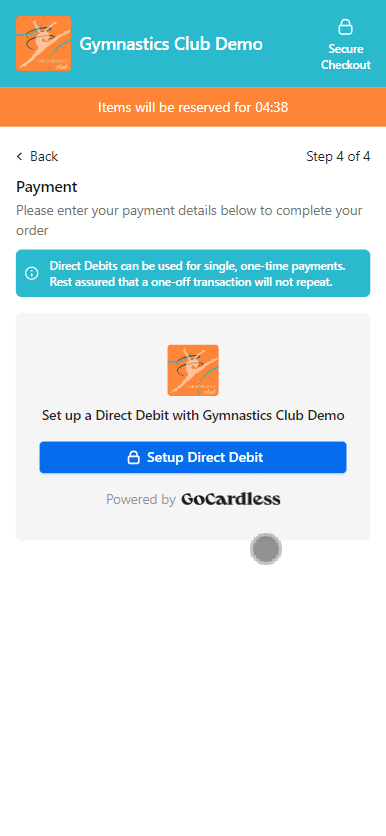
Payment
Based on the organisation's preferences, you will be able to make your payment using either Direct Debit or PayPal.
PayPal allows for one-time card payments and payments from your PayPal wallet, providing a convenient way to make payment and complete the checkout process.
If you are making payment via Direct Debit Mandate, you will be prompted to enter your first/last name, email address, billing address and bank account details.
Note: A Direct Debit mandate can be used for one-off payments or recurring payments.
If you have previously set up a Direct Debit mandate, you will be presented with the date when this mandate was established. You will also have the option to make your payment using the same Direct Debit details.
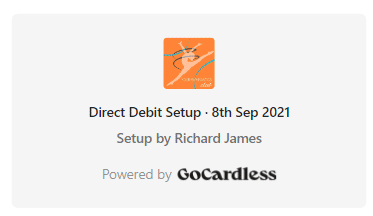
You can manage or cancel your Direct Debit mandates at any time by signing into your online account via https://app.joinin.online and navigating to Account in the side menu > Settings > Payment Methods .
Note: Setting up your mandate does not automatically initiate any payment. To finalise your purchase, you must proceed to the next step in order to complete the checkout process.
Complete Checkout
Once you have set up your Direct Debit Mandate you will need to finalise your purchase. To do this, simply click on the 'Pay Now' button to complete the checkout process.