Video Guide
Recording attendance
Note: Attendance can be recorded by users with Full Admin Access or those with the Coach's role who have been assigned to schedules or products.
Tip: If you're on a mobile device, consider turning your phone to landscape mode. This will give you easier access to all the tabs and enhance your overall experience!

Note: You will need to click on the 'Advanced' tab to see additional details like attendees' medical information, contact notes, and photography consents.

Steps:
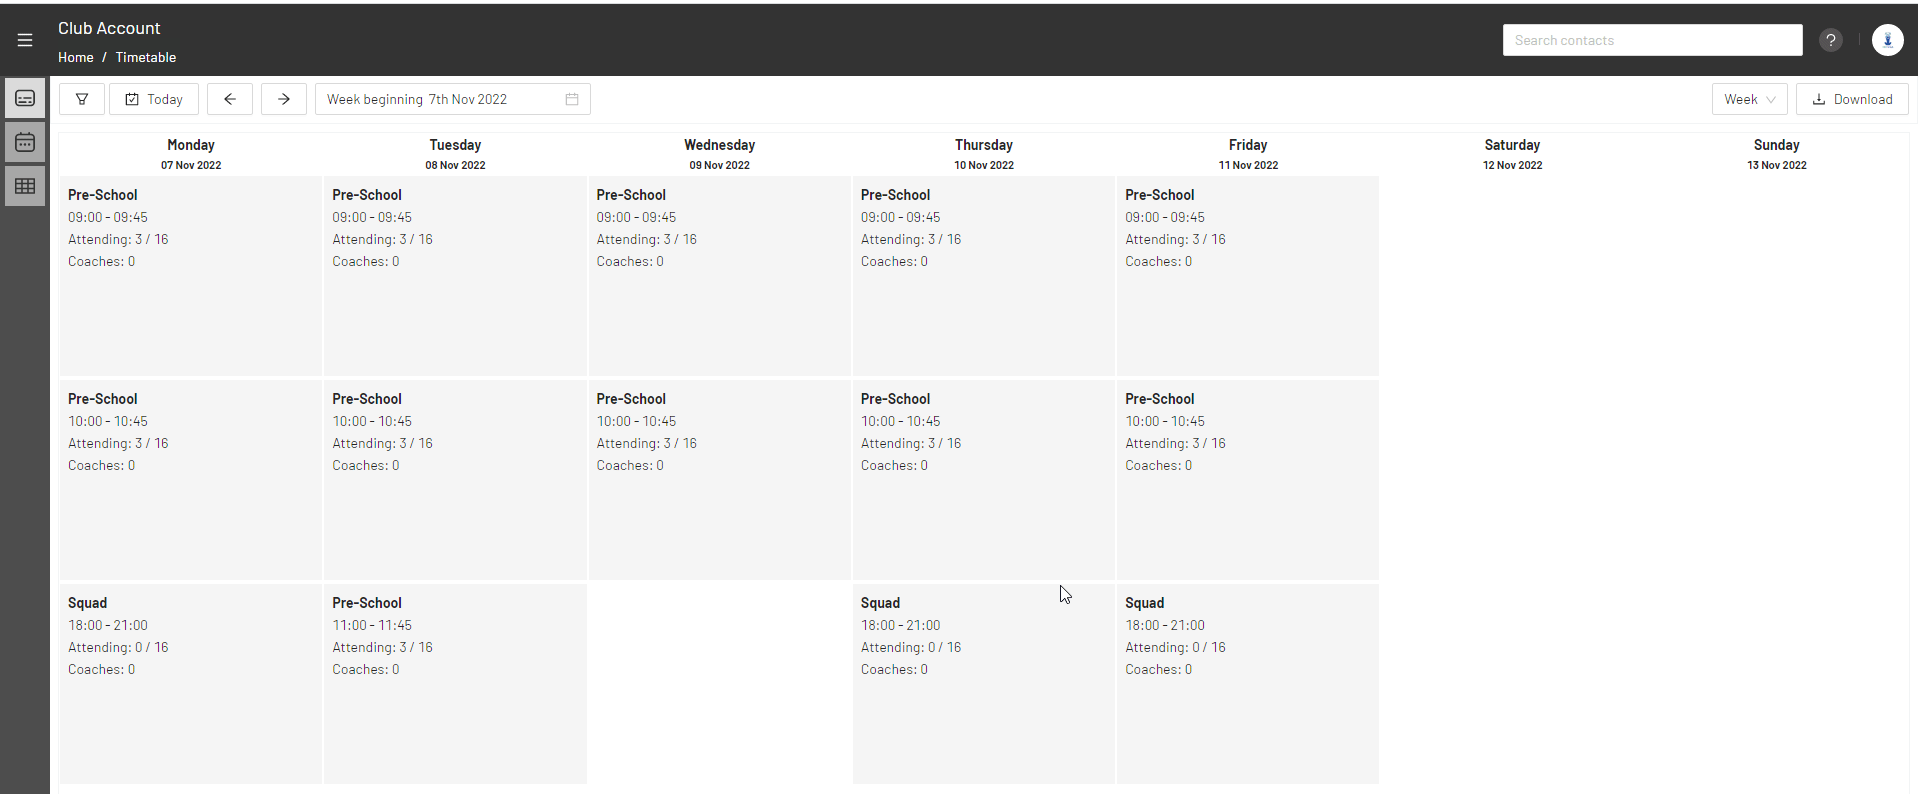
- Navigate to Home > Timetable/Fixtures
- Click on the class or event you want to view the attendees for
-
Use the filter and search tools to find the classes you're interested in. The search tool can be used to search on class/event names and locations
-

-
- To take the register for more than one class at the same time, switch to the Table view first, select your classes, and then click on the 'View all participants' button in the top-right.

Quick View Attendance
To take attendance in the 'Quick View' simply tap a tick or a cross to mark an attendee as present or absent. Tap again to change their status. You can mark attendees as:
- Late
- Sick
- Injured
- On holiday
- Denied Access

Advanced View Attendance
If you need more information about the attendees and further options, then you can switch to the Advanced view. If you are using a mobile device, you will need to rotate your device to landscape mode to have access to the 'Advanced' tab. To view an attendee's full profile at any time, click or tap directly on their name.
Trial - If the member is attending the session on a trial basis. You must use trial pricing in your products for this indicator to work
Medical - Whether the member has provided any medical information. Click or tap directly on their name to load their profile and find their medical information
Notes - If there are any internal notes on the contact's record. Click or tap directly on their name to load their profile and find any added notes
Photos - Indicates whether a member has given consent for their photo to be taken. You must be using the system Photography Consent for this feature to work
- You can mark attendance in bulk by selecting multiple attendees and using the 'Actions' menu.
Recording attendance with the QR reader
Attendance can also be recorded using the QR reader.
Your customers can find their QR within the free JoinIn online app or at https://app.joinin.online
The QR code is found in the side menu, under the QR Codes tab:

Steps:
- When viewing the attendee list, select the 'QR Reader' tab

- The QR scanner will then load on the screen.
Important: If you are not using a mobile device, then you must have a webcam connected and activated on your device. Please ensure you have tested your webcam and that it activates when loading the QR reader before using it with your classes.
Your web browser may require you to give permission before it will activate the webcam.
- Simply ask your member to hold their unique QR code to the camera and wait for the system to acknowledge the code
- If the QR is accepted and matches an attendee's profile in the class, the attendee will be marked as attended once the page has been refreshed.
Offline registers
When taking your registers, you must ensure you have an internet connection, or else your marks will not save.
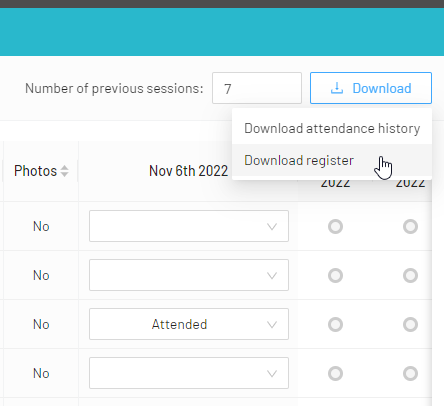
If you need to take an offline register to update on the system later, you can download the class list under the 'Download' menu in the Advanced view.
#timetable #attendance #quickview #advancedview #medical #trial #mark #register #attendance #QR #record