When creating scheduled products, you may wish to set up a waiting list for when these sessions become full. The waiting list can gather details from individuals interested in booking onto the full schedule.
Users who are interested in booking on can add themselves to the waiting list, by going through the checkout process for the product that is currently at maximum capacity. You also have the option to manually add contacts to the waiting list of a product that is at full capacity, by following the add to product process.
Creating a Waiting List
Waiting lists are set up to run as soon as they are selected and saved from the product settings:
- Navigate to Settings > Products
- Select the relevant product or product group
- Click 'Waiting lists'
- Set the waiting list type
- Choose whether you would like to limit the size of your waiting list
- Select 'Save'
Setting up a general Waiting List 'product'
Some organisations, such as swimming schools, choose to maintain a general waiting list that isn't tied to a specific class or schedule. For these, we recommend setting up a separate product to use as a waiting list and manually controlling it. This 'product' waiting list has no automatic options and behaves like any other product. The usual settings are:
- Product Type: Subscription/Membership
- Price: Free
- Billing: 'Approve purchase before payment?' set to 'No'
When a visitor to your booking site adds this free waiting list 'product' to their basket and completing the checkout, the contact will become associated with this product and can be managed into the actual product from the Contacts page.
Waiting List Types
There are a few types of Waiting List available, though we recommending contacting our Support Team, or your Onboarding Specialist to determine the best option.
- First in, first out
- This is an automatic setting and requires the 'Waiting list space available' notification to be active
- When a space is available, the first contact on the list will be sent an invite to the product. If they don't want the space, the next contact will be invited and so on
- Broadcast to all
- This is an automatic setting and requires the 'Waiting list space available' notification to be active
- When a space is available, all contacts on the waiting list will be contacted and the first to purchase the product claims the space
- Manual
- Manual waiting lists are fully controlled by the admins with no automatic features. The admin can manually promote and remove members from waiting lists as needed.
How to Promote or Delete from the Waiting List
Waiting lists are predominantly managed from Timetables/Calendars & Fixtures. This is the only part of the system where you can promote contacts from the waiting lists.
- Navigate to Timetables/Calendars & Fixtures
- Find the relevant session and select 'Waiting List'
- Select the relevant contacts
- Click 'Actions':
- Remove from waiting list: Removes the attendee from the waiting list for the session you are viewing
- Promote from waiting list: Adds the contact to the chosen session and invoices them as per the original chosen settings and the billing settings
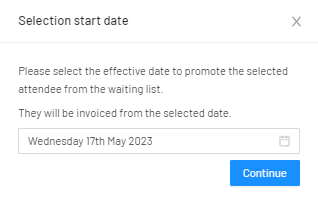
Note: Depending on your billing period, this may charge your contact immediately, so make sure you are happy with the process before proceeding.
Note: If the session (or future sessions) have reached full capacity, promoting from the Waiting List will oversubscribe the class. We advise adjusting the capacity of the product first, to accommodate for the new attendee. This can be actioned in the Product settings.
Viewing Waiting List Information
You can view waiting lists for all of your schedules from Settings > Schedules under the 'Waiting lists' tab
From here you can see the waiting lists by session, by schedules or by attendees. These items can be filtered using the product filter on the left sidebar
You can expand the report with the plus icon (+), to select contacts and delete them from the waiting list they are associated with.
Waiting List Notifications
Notifications are available to assist you in managing the automatic waiting lists effectively. These can be found in Settings > Notifications:
Calendar
Removed from Waiting List - Triggers when the contact is removed from a waiting list
Promoted from Waiting List - Triggers when the contact is promoted from a waiting list
Product
Waiting List Space Available - Triggers when the schedule is no longer at capacity
Manually Adding Contacts to a Waiting List
You can manually add a contact to a waiting list through the add to product option in contacts:
- Navigate to Home > Contacts
- Select the contact(s) you wish to add to a waiting list by using the checkboxes
- Once you have selected your contacts, open the Manage menu from within the left sidebar and choose 'Add to product'
- Select the product the waiting list is attached to
- Choose your options
- When choosing 'To', select either 'Specific calendar entries' or 'From (and including) a specific calendar entry'
- Tick 'Move to waiting list if over capacity?'
- Click 'Preview Changes'
- Click "Process" to finalise
#waitinglist #waiting #list #promote #remove #list #capacity